
To drill into a stud, mark the desired location and use a stud finder to locate the center of the stud. Once found, drill a pilot hole slightly smaller than the diameter of the screw or nail being used, and then proceed with drilling the full-size hole.

Credit: www.amazon.com
Why Drilling Into A Stud Is Important
When it comes to hanging or mounting items on your walls, drilling into a stud is crucial. Studs are vertical wooden or metal beams that provide enhanced stability to your walls. By drilling into a stud, you can ensure that your hanging object is securely supported, preventing it from falling and causing damage or injury.
Enhanced Stability
Drilling into a stud enhances the stability of the wall-mounted item. When you hang something heavy, such as a mirror or a TV, it exerts a significant amount of force on the wall. By securing it to a stud, you distribute the weight across a larger area, minimizing the risk of the item pulling away from the wall or causing damage.
Secure Mounting
A stud provides a firm anchor for your wall-mounted items, ensuring they stay in place. By using screws or nails to attach your objects to a stud, you can be confident that they will remain secure, even when subjected to everyday vibrations and movements. Drilling into a stud is essential for mounting shelving units, cabinets, and any heavy objects that require long-lasting stability.
Avoid Damage
When you drill into a stud, you significantly reduce the chances of damaging your walls. Studs are designed to hold the weight of objects, so they offer greater resistance and durability compared to other parts of the wall. By avoiding drilling into drywall or plaster, which are much more fragile, you can prevent cracks, holes, or even entire sections of the wall collapsing under the weight of your hanging items.
Understanding Studs And Their Locations
When it comes to hanging heavy objects on your walls, drilling into studs is essential for safety and stability. Studs are vertical wooden or metal framing members that provide structural support to your walls. By understanding what studs are and how to locate them, you can ensure that your drilling is spot on, preventing any unintentional damage to your walls.
What Are Studs?
Studs are the backbone of your walls. They are typically made of wood and are spaced evenly apart, usually 16 or 24 inches apart. Studs run vertically from your floor to your ceiling and are responsible for supporting the weight of your walls and any objects hung on them. Understanding the purpose and positioning of studs is essential for successful drilling.
Locating Studs
Locating studs can be a bit tricky, but with the right tools and techniques, it becomes a straightforward process. Here are a few methods to help you find studs:
- Use a stud finder: A stud finder is a handheld device that detects changes in density behind your wall. It can accurately pinpoint the location of studs, making the drilling process easier and more precise.
- Look for visual clues: In some cases, you may find visible signs of studs on your walls. These can include nail heads, seams in the drywall, or electrical outlets. By taking note of these clues, you can estimate where the studs are positioned.
- Measure from a corner or doorway: Studs are typically placed at consistent intervals, making it possible to measure their position from a known reference point, such as a corner or doorway. By measuring from a fixed point, you can get a good idea of where the studs lie.
By using a combination of these methods, you can confidently locate studs and ensure that your drilling is accurate and secure.
Essential Tools And Materials
When it comes to drilling into a stud, having the right tools and materials is crucial for a successful and safe project. From choosing the right drill to ensuring you have the necessary safety equipment, here is a breakdown of the essential tools and materials you will need:
Choosing The Right Drill
Before you start drilling into a stud, it’s important to choose the right drill for the job. There are different types of drills available, each with their own distinct features and capabilities:
- Hammer Drill: This type of drill is perfect for drilling into concrete or masonry. It has a pounding action that helps break through tough materials.
- Cordless Drill: If you prefer a drill that offers portability and convenience without the hassle of cords, a cordless drill is a great option. Just make sure you have a fully charged battery before you start drilling.
- Electric Drill: An electric drill is a reliable and versatile option for drilling into studs. It provides consistent power and is suitable for a wide range of projects.
Types Of Drill Bits
The drill bit you choose will depend on the material you are drilling into. Here are some common types of drill bits:
- Twist Bit: This is the most common type of drill bit. It has flutes that help remove material as you drill.
- Masonry Bit: If you’re drilling into concrete or masonry, a masonry bit with a carbide tip is essential.
- Spade Bit: Spade bits are perfect for drilling larger holes in wood. They have a flat, paddle-like design.
- Forstner Bit: For drilling precise, flat-bottomed holes in wood, a Forstner bit is your best choice.
Other Necessary Tools
In addition to a drill and drill bits, there are a few other tools that you will need for drilling into a stud:
| Tools | Description |
|---|---|
| Tape Measure | Measure the location and depth of the hole accurately. |
| Pencil | Mark the spot where you will drill into the stud. |
| Stud Finder | Locate the position of the stud to avoid drilling into electrical wires or pipes. |
| Level | Ensure that your hole is drilled straight and level. |
| Masking Tape | Place a small piece of masking tape on the drill bit as a depth marker. |
Safety Equipment
Lastly, always prioritize safety when drilling into a stud. Make sure you have the following safety equipment on hand:
- Safety Glasses: Protect your eyes from debris or flying particles.
- Dust Mask: Prevent inhaling dust or debris while drilling.
- Gloves: Keep your hands protected and improve grip on the drill.
:max_bytes(150000):strip_icc()/rsp-best-stud-finders-of-2023-tout-social-c7dd5cd0252e4d03a1903f60c9e28691.jpg)
Credit: www.realsimple.com
Proven Techniques For Drilling Into A Stud
When it comes to hanging shelves, mirrors, or other heavy objects on your walls, drilling into a stud is essential for secure and sturdy support. In this blog post, we will discuss several proven techniques for drilling into a stud, ensuring that your project is successful and hassle-free.
Preparing The Work Surface
Before drilling into a stud, it is crucial to prepare the work surface to create a smooth and clean drilling environment. Clear any obstacles that may obstruct the drilling process, such as furniture, artwork, or decorations. Ensure that the area is well-lit, allowing you to clearly see the stud and maintain accuracy.
Marking The Stud Location
Accurately marking the location of the stud is vital for successful drilling. To do this, use a stud finder or a traditional tapping technique. These tools will help you identify the stud’s edges, allowing you to mark the spot where you will drill. It is recommended to mark the stud’s center to ensure precise drilling and optimal strength for your wall-mounted object.
Drilling Pilot Holes
One of the essential steps in drilling into a stud is creating pilot holes. These small holes will guide the drill bit and prevent the wood from splintering or cracking. Start by selecting the appropriate-sized drill bit for your screws, typically one size smaller than the screws’ diameter. Place the bit into the marked spot and apply firm pressure while drilling. Remember to keep the drill level and perpendicular to the wall surface to ensure accurate and straight pilot holes.
Driving Screws Into The Stud
Once the pilot holes are created, it’s time to drive your screws into the stud. Align the object you’re hanging with the pilot holes and use a power drill or a screwdriver to drive the screws securely. Be mindful of not overtightening the screws, as it may damage the stud or compromise the integrity of the wall. Ensure that the screws are fully driven into the stud but avoid stripping the wall’s material or causing it to crack.
Troubleshooting Tips And Common Mistakes
When it comes to drilling into studs, it’s important to be aware of the potential challenges and mistakes that can arise. By understanding how to troubleshoot common issues, you can ensure a successful drilling experience that doesn’t compromise the integrity of the stud or your project. Let’s take a look at some troubleshooting tips and common mistakes when drilling into studs:
Dealing With Hard Or Dense Studs
Encountering a hard or dense stud during the drilling process can be frustrating, but there are ways to overcome this challenge. Here are some tips to help you navigate through:
- Use a sharp and high-quality drill bit designed for tough materials like metal or hardwood. This will provide the necessary power and precision to penetrate the stud.
- Apply steady pressure and use a slow drilling speed to prevent the bit from overheating or getting stuck.
- If the stud is exceptionally hard, consider using a pilot hole. This smaller hole will act as a guide for the larger drill bit, making it easier to penetrate the stud.
- Ensure that the drill bit is properly aligned with the intended drilling spot to avoid unnecessary force or damage to the stud.
Avoiding Splitting Of Studs
One of the common mistakes that can occur when drilling into studs is splitting. To prevent this from happening, keep these tips in mind:
- Choose the right size of drill bit that matches the diameter of the screw or anchor you plan to use. Using a smaller bit may cause the stud to split under pressure.
- Mark the drilling spot accurately on the stud and make sure to stay within the marked area to avoid weakening the surrounding wood.
- Maintain a steady drilling speed and apply gentle pressure to prevent the bit from catching or veering off-course.
- Consider using a pilot hole if you’re working with a particularly narrow or delicate stud. This can help reduce the risk of splitting.
Recovering From Misaligned Holes
If you find yourself with a misaligned hole during the drilling process, don’t worry. Here’s how you can recover from this common mistake:
- First, assess the extent of the misalignment. If it’s only slight, you may be able to adjust the screw or anchor to compensate for the angle.
- If the misalignment is significant, you can remove the screw or anchor and fill the hole with wood filler. Once the filler is dry, you can re-drill the hole in the correct position.
- Alternatively, you can use a larger screw or anchor to cover the misaligned hole, provided it doesn’t compromise the structural integrity of your project.
By being aware of these troubleshooting tips and common mistakes, you can approach drilling into studs with confidence and avoid potential setbacks. Remember to take your time, use the right tools, and maintain precision throughout the drilling process. Happy drilling!
Credit: www.homedepot.com
Frequently Asked Questions For How To Drill Into Stud
Is It Okay To Drill Into A Stud?
Yes, it is safe to drill into a stud. Drilling into a stud provides stability and support for hanging heavy objects or installing shelves. Make sure to use appropriate tools and follow safety precautions to avoid damaging the stud or causing any structural issues.
Can You Drill Into A Stud Without A Pilot Hole?
Yes, you can drill into a stud without a pilot hole, but it is not recommended. A pilot hole helps prevent the stud from splitting and ensures a more accurate and secure drilling.
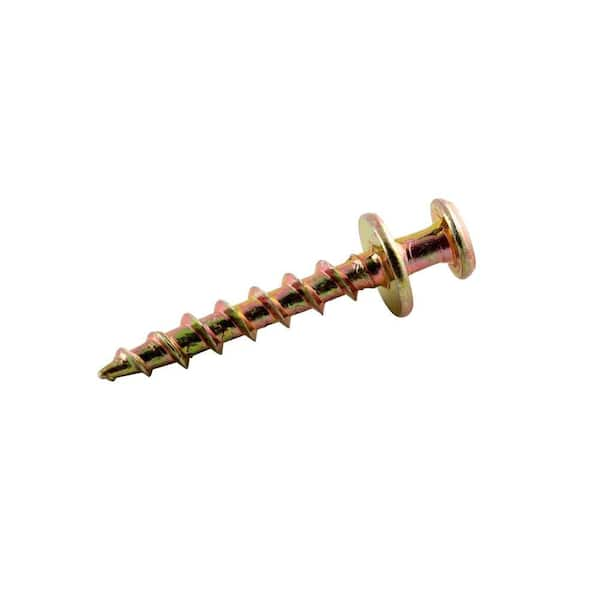
What Kind Of Screws Do You Use To Drill A Stud?
Use wood screws to drill into a stud.
What Kind Of Drill Goes Through Studs?
A power drill with a strong motor and high torque can easily go through studs. Just make sure to use a drill bit designed specifically for drilling into wood and adjust the drill speed accordingly.
Conclusion
Drilling into studs requires precision and care to ensure proper stability and support for your projects. By following the steps outlined you can confidently locate and drill into studs without causing damage or compromising the integrity of your walls.
Remember to use a stud finder, choose the right drill bit, and employ the proper drilling technique. With these tips, you’ll be able to tackle any project that requires drilling into studs with confidence.
Pingback: how to install electric chain hoist