
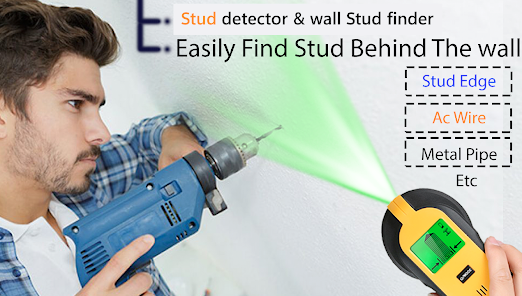
A stud finder is a device used to accurately locate studs behind walls or ceilings. In construction or home improvement projects, knowing the location of studs is crucial for securely hanging heavy objects like shelves or cabinetry.
With the help of a stud finder, you can easily and quickly determine where the studs are located, ensuring stability and safety for your installations. Whether you are a professional contractor or a DIY enthusiast, a stud finder is an essential tool that saves time and eliminates guesswork.
By using electronic sensors or magnets, stud finders detect density changes in the wall and provide a visual or audible signal to indicate the stud’s position. Invest in a reliable stud finder to make your projects more efficient and accurate.
Types Of Stud Finders
When it comes to finding studs in walls, the right stud finder can make the task much easier and more efficient. There are different types of stud finders available in the market, each with its own set of features and functionalities. In this blog post, we will explore the three main types of stud finders: Magnetic, Electronic, and Multi-sensor stud finders.
Magnetic Stud Finders
Magnetic stud finders are a simple and affordable option for locating studs. These stud finders work on the principle that wall studs are usually made of wood, which is a non-magnetic material. Therefore, when a magnetic stud finder comes across a stud, it will detect the change in magnetic field.
Here’s how a magnetic stud finder works:
- The stud finder is placed against the wall and moved horizontally until it detects a stud.
- Once the magnetic stud finder finds a stud, it sticks to the wall, indicating the presence of a stud.
Magnetic stud finders are easy to use and do not require batteries or calibration. However, they may not be as accurate as electronic or multi-sensor stud finders, especially in walls with multiple layers of materials.
Electronic Stud Finders
Electronic stud finders are more advanced tools compared to magnetic stud finders. They use electronic sensors to detect changes in density or composition behind the wall, allowing for more accurate stud detection.
Here’s how an electronic stud finder works:
- The electronic stud finder is placed against the wall and moved horizontally.
- It emits a low-energy radiofrequency signal into the wall.
- When the signal encounters a change in density, such as a stud, it reflects back to the sensor, indicating the presence of a stud.
Electronic stud finders often come with additional features like depth detection, marking capabilities, and the ability to detect live wiring. They require batteries and may need calibration before use. They are suitable for detecting studs in various wall materials, making them a versatile choice.
Multi-sensor Stud Finders
Multi-sensor stud finders combine the magnetic and electronic technology to provide even more accurate stud detection. These stud finders utilize multiple sensors to detect changes in both magnetic fields and density behind the wall.
Here’s how a multi-sensor stud finder works:
- The multi-sensor stud finder is placed against the wall and moved horizontally.
- It uses a combination of magnetic and electronic sensors to detect studs.
- When a stud is detected, the sensors work together to provide a clear and precise indication of the stud’s location.
Multi-sensor stud finders are known for their high accuracy and versatility. They can detect studs in various wall materials and provide additional features like marking capabilities and live wire detection. However, they are usually more expensive compared to magnetic or electronic stud finders.
Credit: play.google.com
Using A Stud Finder
Discover the convenience of using a stud finder for all your home projects. Easily locate and mark studs in walls with this essential tool for precise and hassle-free mounting.
Preparing The Area
Before you start using a stud finder, it’s important to prepare the area to ensure accurate results. Clear any clutter or debris that may interfere with the stud finder’s readings. Remove any wall hangings or decorations that might block your access to the wall surface. Make sure the wall is clean, free from any dust or dirt that could affect the accuracy of the stud finder.
Operating The Stud Finder
Operating a stud finder may seem straightforward, but there are a few tips to master it effectively. Begin by holding the stud finder firmly against the wall. Move it in slow, horizontal motions while keeping it level. Most stud finders have an indicator light or beep that will alert you when it detects a stud, so pay close attention to these signals. If your stud finder has a “calibration” feature, don’t forget to perform this step before scanning the wall to ensure accurate readings.
Interpreting The Results
Once you run the stud finder along the wall, it’s time to interpret the results. When the stud finder detects a stud, it will indicate its presence by flashing a light or producing a distinct sound. Mark the edges of the stud with a pencil or masking tape to clearly indicate its location. Remember that stud finders are not foolproof, so it’s recommended to verify the presence of a stud by gently tapping the wall and listening for a solid sound that indicates the stud’s existence.
Using a stud finder is a valuable skill for any DIY enthusiast. By following the steps outlined above, you can navigate through walls with confidence, making your home improvement projects a breeze. So, prepare the area, operate the stud finder with precision, and interpret the results accurately to find the studs you need for your next project.
Tips And Tricks For Successful Use
When it comes to hanging shelves, mirrors, or any sort of decor on your walls, using a stud finder is essential to ensure a secure and long-lasting installation. However, mastering the art of using a stud finder can be a bit tricky if you’re not familiar with the proper techniques. In this article, we will share some valuable tips and tricks to help you successfully use a stud finder for all your DIY projects.
Calibrating The Stud Finder
Before you start scanning your walls for studs, it’s crucial to calibrate your stud finder properly. Calibrating your device ensures accurate readings and leads to more successful outcomes.
Follow these simple steps to calibrate your stud finder:
- Turn on the stud finder and hold it against a bare wall.
- Press the calibration button or any other designated button to initiate the calibration process.
- Wait for the device to stabilize and indicate that it’s ready for use.
Remember to recalibrate your stud finder if you experience any false readings or if you turn off the device midway through your project.
Identifying False Positives
No matter how experienced you are with using a stud finder, there are always chances of encountering false positives. False positives can occur when the stud finder picks up on other materials or objects in the wall, leading to inaccurate stud detection.
To prevent false positives, keep the following tips in mind:
- Avoid scanning areas that have metal pipes, wiring, or plaster patches, as these can interfere with accurate stud detection.
- If you encounter a strong reading but find it hard to locate the exact edges of the stud, try scanning the nearby areas and follow the pattern to get a clearer picture of the stud location.
- Remember that stud finders are generally more accurate when used on drywall rather than on other surfaces like tile or paneling.
Finding Studs In Difficult Surfaces
Scanning for studs in difficult surfaces can be challenging, but with the right techniques, it’s not impossible. Here’s how you can find studs in such surfaces:
| Surface Type | Technique |
|---|---|
| Tile or Paneling | Use a stud finder specifically designed for these surfaces or switch to a different mode if your device offers multiple scanning modes. |
| Lath and Plaster | Look for nail heads or screws that indicate the presence of studs. You can also try tapping the wall lightly to identify the denser areas. |
| Concrete or Brick | Use a masonry drill bit to create pilot holes in the suspected stud locations. If the bit encounters resistance, it’s likely that you’ve found a stud. |
By employing these tips and tricks, you can make the most out of your stud finder and ensure successful results with your DIY projects. Remember to always follow the manufacturer’s instructions for your particular device and practice patience as you hone your stud-finding skills.

Credit: www.jpost.com

Credit: www.amazon.com
Frequently Asked Questions On Stud Finder
Can I Use My Phone As A Stud Finder?
No, you cannot use your phone as a stud finder. A phone does not have the necessary hardware or technology to detect studs in walls. A stud finder is a separate tool designed specifically for this purpose.
What Does A Stud Finder Actually Detect?
A stud finder detects the presence of wooden or metal studs behind walls. It uses sensors to identify density changes and signals when it finds a stud.
Is It Worth Getting A Stud Finder?
Yes, it is worth getting a stud finder. It accurately locates studs behind walls, saving time and effort.
How Do I Find A Stud Without A Device?
To find a stud without a device, use common household items like a flashlight or magnet. Shine the flashlight along the wall and look for small indentations or wood grain patterns that could indicate a stud. Alternatively, a magnet can be used to detect metal screws or nails in the wall.
Conclusion
To sum up, a stud finder is an essential tool for any DIY enthusiast looking to hang shelves, artwork, or install fixtures securely. With its advanced features, such as accuracy, multi-sensor technology, and user-friendly interface, finding studs has never been easier.
By investing in a reliable stud finder, you can save time, effort, and frustration, ensuring your projects are successful and long-lasting. Say goodbye to trial and error, and say hello to precise and efficient stud detection!